Early February of last year, I wrote a couple posts that I was considering a Raspberry Pi 2, and the fact that it was six times faster than the B+ made it more appealing.
At some point I ended up finding a dual-core ARM board that was released as competition to the Raspberry Pi called the Banana Pi, which has gigabit ethernet and a SATA port. I was quite interested in it for using it for my bittorrent server, considering I can properly hook up a hard drive and be able to pull files off of said hard drive over the LAN much quicker.
I believe it was around early May that I began thinking of how to mount everything - the Raspberry Pi 2, the Banana Pi and the 2.5" hard drive. I drew quite a few designs and my friend at work gave me the suggestion for a 3D-printed case, which I didn't feel was going to be worth it. I originally wanted the case to have separate layers for each item and have the airflow in a certain way where it would effectively cool each item (there would be a fan that pushes the air out). I eventually realised that it would be space efficient to have a case that mounts to the back of a monitor, so it takes up less table space, and I took quite a bit of time to pick out a good box before drawing up anything else.
I then spent quite a bit of time figuring out how I wanted to arrange the parts inside the box, since I wanted to try to have a good airflow so the parts stay relatively cool. I think I went through a few ideas with the fan on the side wall (in relation to the box itself) before realising the fan hole would be fairly difficult to cut.
Eventually I found a couple of unused blower fans back from when I was trying to keep Ziggy cool, one of which didn't have wires because they broke off. I soldered a pair of wires to it and tested it, finding that it worked just fine, so I decided to use that instead of the regular case fan.
Since I was going to have another hard drive to keep my music files local for the Raspberry Pi 2, I had to keep the arrangement simple enough, and using an adaptor for mounting two 2.5" hard drives in a 3.5" bay was the way to go. I eventually decided to have the hard drive stack sit in the middle of the box, toward the side (again, in reference to the box), have one of the single-board computers (SBC) to one side of the stack, and the other to the other side (upside-down), with both SBC toward the opposite side (in sort of parabolic curve); the fan would be attached to the lid and blow out of the side.
Luckily, I waited long enough and a new version of the Banana Pi came out which had a bit of improvements, and so I bought it along with most of what I needed. I carefully drilled the hole patterns for the hard drive, the Raspberry Pi 2, the Banana pi, and VESA mounting before doing a bit of prototyping with the boards and box.
I used some of the stand-offs that I bought to mount that PCI-E adaptor thingy that I put in Melty to stand off the SBCs, and eventually found that I was going to need more than just one to properly run all the cables. I ended up using four for the Raspberry Pi 2 and six for the Banana Pi. Since using a bunch of the stand-offs wasn't exactly straight, I decided to look for something similar in height for both. For the Raspberry Pi 2, I used a 30mm stand-off (which accepts screws on both sides, lowering the height from the prototyped 32mm), and 50mm for the Banana Pi (accepts a screw on one side, raising the height from the prototyped 48mm). Luckily, the two millimetre difference of both stand-offs were really negligible when I prototyped it again.
When prototyping the first time, I realised that the adaptor brackets blocked the lower holes for the VESA mount, so I originally came up with that I would mount the lower hard drive to the box, mount the box to the monitor, then mount the bracket-attached upper hard drive to the lower one in a really awkward way. Eventually I had a "kickself" moment and grabbed some scrap aluminium sheets from work and made my own mounting plates, so that the lower screws wouldn't be blocked off (and also saves the adaptor bracket for its intended use).
With that, I carefully drilled the intake hole horizontally centre between the holes to the hard drive mounting a bit toward the bottom of the box (in relation to it's mounted configuration), cut the hole for the blower fan, and drilled the holes for mounting the blower fan. I think I also cut the holes for the cables at this time as well. The holes that I cut were awkward to do, since I was using a jeweller's saw, and if I had the right bits for the high-speed drill, I probably would have used it.


Inside, backside, and inside bottom of the box.
Since the only button-head screws I had were metric (there's a very small selection of small button-head screws at work), they ended up being much longer than I needed, and I prototyped a bit to figure out how much I'd have to cut off, which definitely easier said than done. I used button-heads because of the low profile, and I wanted to keep air resistance to a minimum since the heads were to reside inside the fan.
I made the mistake that I wouldn't be able to tighten the nylon locknuts or properly assemble the fan while doing this, and so I had to drill a couple more holes in the fan's case, so that I could access the screws. I obviously covered the holes with electrical tape and cut off the angled part of the metal bracket (which can partially be seen in the top view picture).


Inside, outside, and top of lid with fan attached.
Though it wasn't really needed, I kept the silicone seal piece in the lid (I had to actually remove it to cut the hole because it was annoying). I then cut a square of the mesh stuff that I bought as a filter for the side panel for Mei-chan and taped it on the outside of the box over the hole. I tried not to cover the holes, but I found I hadn't much choice and cleaned the holes with an X-acto knife.


Inside and outside of the box with the mesh (I propped the box up for the inside view because the mesh blended into the carpet).
With the mounting plates, I taped the two pieces together, so that I could drill two holes at once, and it was somewhat awkward to mark the holes from the adaptor bracket, but the holes came out just fine. It was a bit tough to position the holes right, because I wanted to where it directed the airflow some, keep the drives apart enough, so that it wouldn't interfere too much with each other (because I had it planned where the tops of the hard drives would face each other), and not have the holes too close to the edge of the metal.
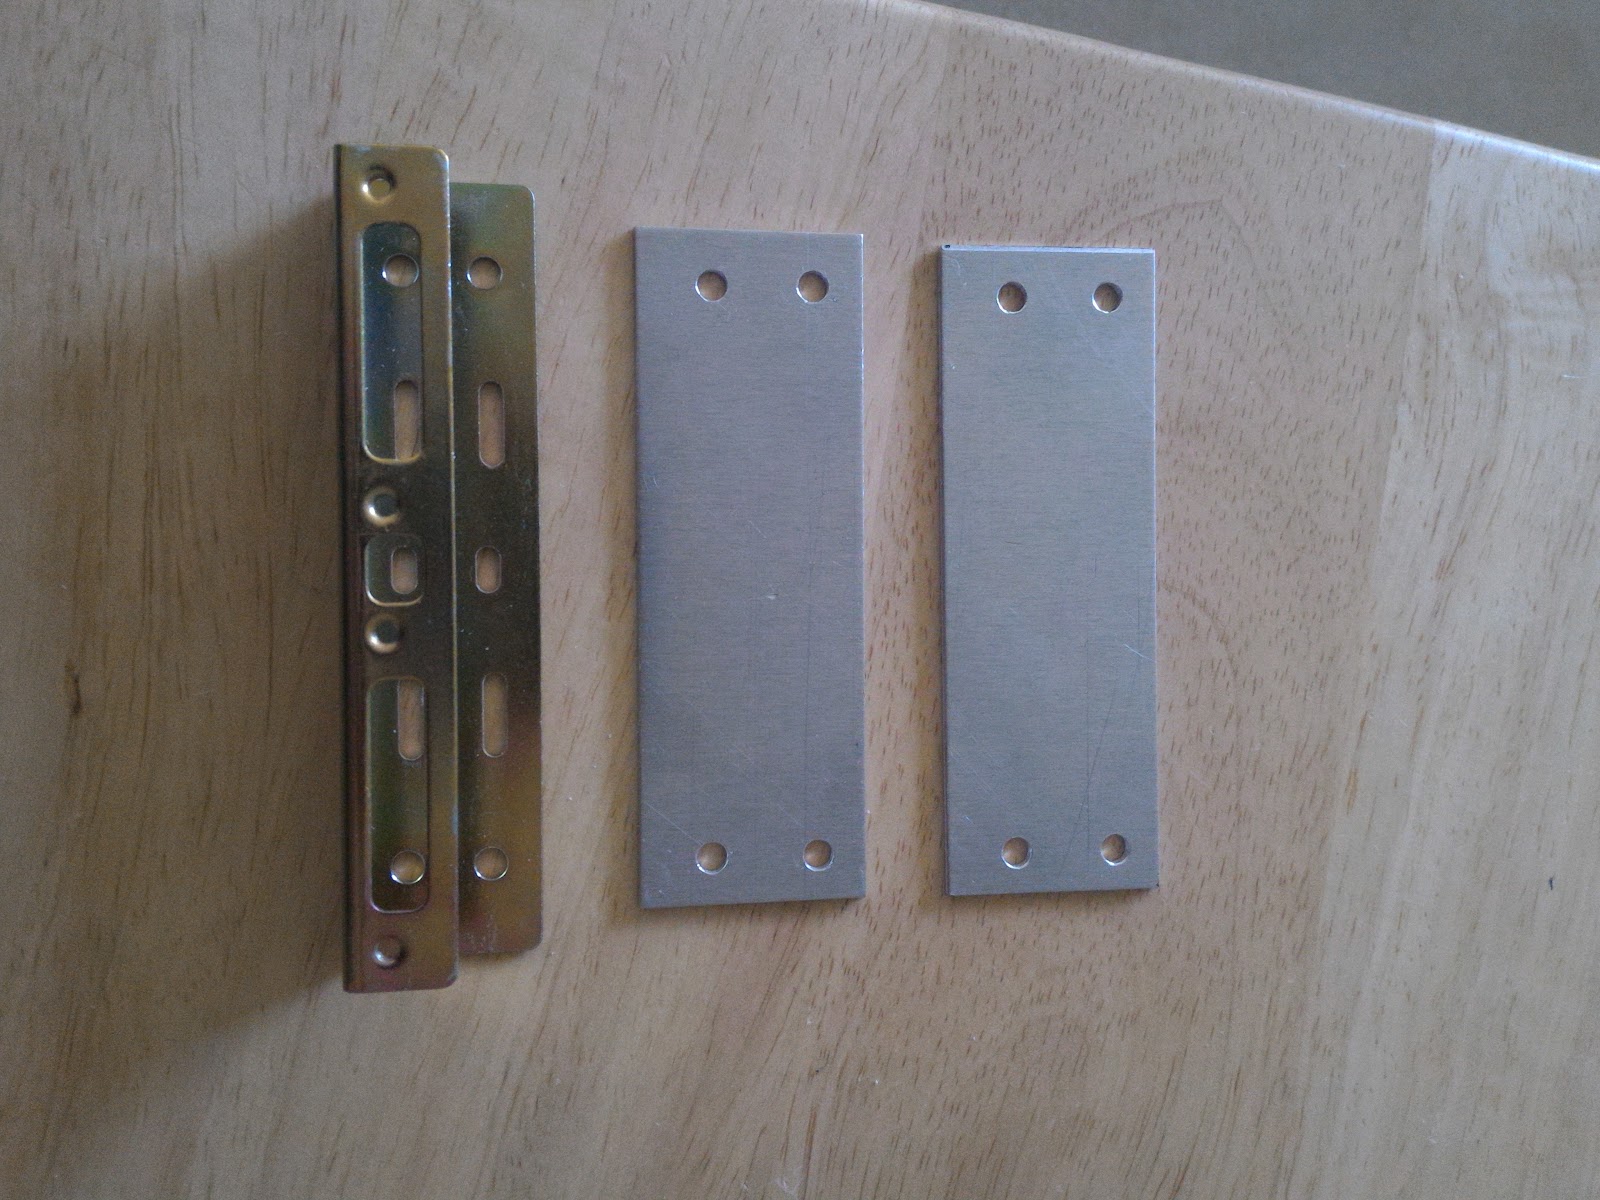
Adaptation bracket, and the two mounting plates.
Sometime during testing, the Raspberry Pi 2 wasn't able to power the hard drive I wanted to use, so I was forced to buy an SSD for it (the Raspberry Pi 2 literally puts out no more than 500mA, and the hard drive I was trying to use needed another 50mA :T).
I just remembered that I wanted to space the hard drive apart from the SSD so that the SSD has a less likely chance to absorb heat from the hard drive (in retrospect, just something that really wouldn't matter). Anyway, after assembling the hard drive unit together, I realised that I could've lowered the mounting plates a bit more to really direct the airflow. Que sera sera.


Top 3/4 view and "bottom" view of the unit.
Since the stand-offs are screwed into the bottom mounting holes of the hard drive, I had to use some washers to reduce the length of the screws to the mounting plate. The threaded portion of the stand-offs were too long for the bottom mounting holes of the hard drive, so I used the included nut to reduce the length. I believe I used thread-locking compound for (at least) the bottom mounting screws to the mounting plates, so that the vibration doesn't loosen the screws.


3/4 view of the washers, and bottom view of the unit.
After assembling the hard drive unit, I mounted it into the box.


Inside and outside with the hard drive unit mounted.
Then I mounted the SBCs (after plugging the fan into the Banana Pi, since it's "upside-down") and mounted it to the monitor. I used a washer between the screw-head and the box since the plastic was a bit soft (I don't remember if it's ABS, poly-carbonite, or a mixture of both). I used a spacer between the box and the monitor, so the intake wasn't clogged, along with keeping the screws and nuts from pressing into the monitor (or worse, warping that side of the box). As I positioned the lid, I routed the cable to the fan, so that it wouldn't get sandwiched on any of the seams. It turned out quite well, minus the hand-cut screws protruding from the nylon locknuts.


Finished inside, outside, and top.
I had the Raspberry Pi 2 hooked up to the DVI port and the Banana Pi to the VGA port, and use the monitor's menu to switch between them (when needed).


Later, I got the button-head screws in the right length, so that it would be flush with the "top" of the nylon locknut to look nicer.

Colour is slightly off because of the flash.
Later I did some experimentation with the command-line interface of transmission and found it wasn't all that bad, so I decided to redo the Banana Pi a bit, so that I wouldn't need the monitor (or Bluetooth adapter). While I thought it'd be simple, it was a bit different than I was expecting (the folder was a bit different because the folder the CLI uses is transmission-daemon and not transmission. Once that was figured out, it was up and running in openSUSE Tumbleweed instead of the Banana Pi openSUSE image.
The Raspberry Pi 2 is better than the original Raspberry Pi (generation one), but still don't see the 1080p playback (again, with XFCE and VLC)... Whatever.
With the announcement/release (I don't remember off the top of my head at the moment) of the Raspberry Pi 3, it will be replacing the Raspberry Pi 2 after some testing. I might run Debian testing on the Raspberry Pi 3, but we'll have to see. The reason why I want to do this is because the Raspberry Pi 3 has built in Bluetooth (and also WiFi, which will be turned off), which saves me a USB port. It also has a bit of a performance increase, but I'm not expecting much. There's also the ARM64 architecture, but I'm doubting it'll have any visible impact either.
As far as the name goes, I took a few days to think about it, eventually turning "double drive-by" to "double drive-pi" because there was two "pi's" and two hard drives. I quickly put the "official" name in mathematical notation - 2(DrivePi) - where "DrivePi" is each Pi and hard drive combination, and the 2 in front of the parenthesis multiples the parenthesis' contents by two (in other words, doubling). I kinda want to have it on the lid, and use the screw/nylon locknut protrusion for the dots of each "i", but it wasn't going to be doable. Well, I had thought about it again, and I could very well put the two at the end, though it technically would be read "drive-pi doubled" instead. I'll worry about it when I actually care.
That's all on the 2(DrivePi) for now. It's not 100% complete, but at least it's well over 90%.


