I forgot when I saw an article about it, but it was pretty recent, as Kaisen 2.0 was released 14 December. I meant to get it and see what was different, but kept forgetting.
Anyway, I tried to read through the changelog, but it ended up becoming a chore, and I decided to try to search for whisker for the hell of it, expecting no mention. But I was very wrong once I typed s into the search. Had I tried to hold out a little longer, I would've read the line that says Whisker is now the default menu, but no, because ADHD. I doubt my previous post into the void was the cause, but I'm sure someone(s) somewhere either said something on the forums, gitlab, whatever. I was so excited that I had to post about it.
I don't remember if there was a system recovery version of Kaisen, but there is now, which is a lot more of what I want, since my use case is more towards that than having something that I could install and daily drive (Manjaro's still working just fine for me).
Showing posts with label Linux. Show all posts
Showing posts with label Linux. Show all posts
17 December 2021
21 September 2021
Ventoy, Kaisen Linux, Clear Linux
I found Kaisen Linux a while ago, but didn't really get around to testing it until early August (I had to download the newer version).
I couldn't remember what USB multi-boot utility I was using after
Back to Kaisen, it's a distro with sysadmin tools, which what originally got me interested in it because I wanted something that was more current and free than Parted Magic (last I remember, Parted Magic made you pay for current versions, but had previous versions for free), and also something less annoying than GParted Live (GParted asks for the keyboard layout during bootup). While Kaisen doesn't boot as fast as Parted Magic or GParted from what I remember, it's something I like more, even though the XFCE menu is the stock one and not the superior Whisker menu. The ISO includes English and French as an option, like Parted Magic does, but the keyboard is QWERTY instead of AZERTY when booting into English (another annoyance with Parted Magic). The menu is categorised appropriately, I think, but for someone like me that's used to the Whisker menu, it was annoying to find
With the power of Ventoy, I wanted to rebuild a set of Linux distros as I previously had on the drive (installing Ventoy wipes the drive), so I poked around to see what else to get besides some obvious choices like Manjaro, openSUSE, and Fedora. I came upon Clear Linux, which is it's own distribution (not forked from anything), and decided to give it a shot since it claims to be optimised for performance. I don't think I've ever booted any faster into a live distro than Clear. I tried to test on Triela, but Clear requires certain CPU instruction sets to run, none of which Triela has (SSSE3 (three Ss, not two), SSE4.1, SSE4.2, CLMUL). Because Melty has those instruction sets (pretty much AMD FX CPUs and newer), I could've tried Clear on Melty, but I didn't really feel like bothering with it. Not really much else to say, since I didn't really do much besides poke a bit at it.
I did try Debian, but I think I had problems or something, but well, I really prefer something that has newer packages like openSUSE Leap. I get that Debian's supposed to be rock solid, but honestly, Manjaro's been pretty solid on Pod for only having installed once. I also tried GhostBSD, but I don't remember if it worked; if it did, I wasn't in it for too long (I was really just after if I could boot into it or not with Triela and Bazett). Oh, one interesting thing when booting into openSUSE Tumbleweed on Bazett was that during the boot, it showed the HP logo.

The logo section was blank when I booted openSUSE Leap on Triela, but it's possible she's too old for that sort of special treatment (or it could just be only on HP laptops, I dunno, I'd need a larger sample size).
I couldn't remember what USB multi-boot utility I was using after
multiboot, but I couldn't seem to find it? Or it may just have been multiboot, but regardless, I couldn't find any hint of what it was. I came upon Ventoy, which is kinda multiboot's successor. Anyway, you install it to the USB drive and then drop the ISOs (or IMGs) directly onto the USB drive. I didn't really read the doc that well since I only read it for installation of Ventoy on the USB drive and then closed the tab, so I didn't realise I just had to plop the ISOs to the drive. It's a lot easier/faster/nicer than multiboot since it's drag and drop after the initial installation (multiboot has an install/uninstall ISO process that unpacks/cleans them in a certain way, which takes longer than just dropping/deleting an ISO file). IMGs only really work on UEFI systems btw, I learned this with Memtest86 V4 and Triela.Back to Kaisen, it's a distro with sysadmin tools, which what originally got me interested in it because I wanted something that was more current and free than Parted Magic (last I remember, Parted Magic made you pay for current versions, but had previous versions for free), and also something less annoying than GParted Live (GParted asks for the keyboard layout during bootup). While Kaisen doesn't boot as fast as Parted Magic or GParted from what I remember, it's something I like more, even though the XFCE menu is the stock one and not the superior Whisker menu. The ISO includes English and French as an option, like Parted Magic does, but the keyboard is QWERTY instead of AZERTY when booting into English (another annoyance with Parted Magic). The menu is categorised appropriately, I think, but for someone like me that's used to the Whisker menu, it was annoying to find
gparted. While I did find it, it's sadly quicker to just Alt+F2 and type for it. I don't think the Whisker menu is customisable like the stock XFCE one, but Whisker does include a search function that makes it easier to find stuff. It'd be nice if the Kaisen team can use Whisker instead or alongside the stock one, but I doubt it'll happen. But with this, definitely not bothering with Parted Magic or GParted Live ever again.With the power of Ventoy, I wanted to rebuild a set of Linux distros as I previously had on the drive (installing Ventoy wipes the drive), so I poked around to see what else to get besides some obvious choices like Manjaro, openSUSE, and Fedora. I came upon Clear Linux, which is it's own distribution (not forked from anything), and decided to give it a shot since it claims to be optimised for performance. I don't think I've ever booted any faster into a live distro than Clear. I tried to test on Triela, but Clear requires certain CPU instruction sets to run, none of which Triela has (SSSE3 (three Ss, not two), SSE4.1, SSE4.2, CLMUL). Because Melty has those instruction sets (pretty much AMD FX CPUs and newer), I could've tried Clear on Melty, but I didn't really feel like bothering with it. Not really much else to say, since I didn't really do much besides poke a bit at it.
I did try Debian, but I think I had problems or something, but well, I really prefer something that has newer packages like openSUSE Leap. I get that Debian's supposed to be rock solid, but honestly, Manjaro's been pretty solid on Pod for only having installed once. I also tried GhostBSD, but I don't remember if it worked; if it did, I wasn't in it for too long (I was really just after if I could boot into it or not with Triela and Bazett). Oh, one interesting thing when booting into openSUSE Tumbleweed on Bazett was that during the boot, it showed the HP logo.

Not the best shot, but I was trying to avoid reflections of myself and the overhead light.
∞ Tumbleweed is right below the shadow of my phone and above the bright spot of the overhead light.
∞ Tumbleweed is right below the shadow of my phone and above the bright spot of the overhead light.
The logo section was blank when I booted openSUSE Leap on Triela, but it's possible she's too old for that sort of special treatment (or it could just be only on HP laptops, I dunno, I'd need a larger sample size).
10 June 2021
Shizuma
I can't remember all I previously typed (see "updates" for exactly what I mean), but essentially some things happened and my best friend was able to get Shizuma back. While it was a bit unreal, I did check the battery/hard drive panel and sure enough the misalignment on the panel at the hard drive was there (from when I put a 11.5mm tall hard drive in without knowing/realising 9.5mm was the limit), so I knew it was Shizuma.
I was going to install Snow Leopard, but ended up poking around trying some live Linux distros while I was at my best friend's place since the DVD drive didn't seem to want to read the snow leopard disk for some reason.
Sometime later (at home), I got the DVD drive out of Shizuma and disassembled it to find nothing obviously wrong and once I put it back in, it read the disk just fine. I installed Snow Leopard after doing a "half and half" partition scheme on the hard drive and then installed Manjaro afterwards. Booting was kinda weird since it goes straight to GRUB2 and trying to boot OSX from GRUB2 results in a kernel panic, but this was solved by disabling GRUB2's OS probe and holding option when turning Shizuma on to properly boot OSX.
I found that I could put 8GB of ram in Shizuma as long as the firmware was at least a certain version, and Shizuma had the latest version (well, the last for that model) already installed when I checked.
I applied new thermal paste since I don't doubt that Shizuma had anything but the original paste, and found that a couple of the dies still had a miniscule amount ofliquid non-solidified paste. I also found that the heatsink copper for one of the dies had oxidised unevenly in the pattern of the etched markings on the die. Surprisingly, the heatsink fins were fairly clean with some dust on the outer fins, but even though the airflow design's not really great for cooling, it's at least decent for keeping the heatsink fins clean.
I got the ram about a week after that and installed it before trying to run MemTest86 (after figuring out how why the option was missing in GRUB), finding that 4-5 passes is the usual amount that most people test for. I saw the first pass finish after about an hour, so I was thinking another three hours and it should be done, but I was wrong and I stopped the test after getting too tired from staying up.
I started again the next morning and after about an hour, the screen turned off, which I found the cause to be that Shizuma wasn't plugged in. after I plugged her in, I started it once more and occasionally glanced at the screen. First pass took an hour (as I had seen previously), second test took about two hours (which I was also aware of), third test took three hours, and the fourth took about four hours for a total of about eight hours.
I don't remember exactly when I went and reinstalled Snow Leopard and Manjaro, but I did it to repartition the drive since I really didn't need to give OSX half the drive.
The reason why MemTest86 didn't show up in GRUB2 was because of Shizuma's EFI, so I needed to use the UEFI version of MemTest86 which was luckily in AUR, and after installing and rebooting, it showed up in GRUB2.
Recently I got a laptop stand with fans, but with the minute space between the top of the stand and the bottom of Shizuma, the airflow isn't great. As of this draft writing, I'm currently designing a riser that uses the mesh to stabilise it's location and lift the hinge end about 20mm.
I'm not entirely sure what I'll be using Shizuma for, but I'll find a use at some point.
With the laptop stand, I just used rubber feet to raise the hinge end up about 10mm (unless the stand I was originally talking about is a different one, I dunno). I also changed the 5 volt fans out for 12 volt ones and designed a replacement control board that uses a Firewire 400 jack to get power from Shizuma's Firewire 800 jack (via a Firewire 800 to Firewire 400 cable). I might write more about the replacment control board in a separate post, but don't hold your breath.
I was going to install Snow Leopard, but ended up poking around trying some live Linux distros while I was at my best friend's place since the DVD drive didn't seem to want to read the snow leopard disk for some reason.
Sometime later (at home), I got the DVD drive out of Shizuma and disassembled it to find nothing obviously wrong and once I put it back in, it read the disk just fine. I installed Snow Leopard after doing a "half and half" partition scheme on the hard drive and then installed Manjaro afterwards. Booting was kinda weird since it goes straight to GRUB2 and trying to boot OSX from GRUB2 results in a kernel panic, but this was solved by disabling GRUB2's OS probe and holding option when turning Shizuma on to properly boot OSX.
I found that I could put 8GB of ram in Shizuma as long as the firmware was at least a certain version, and Shizuma had the latest version (well, the last for that model) already installed when I checked.
I applied new thermal paste since I don't doubt that Shizuma had anything but the original paste, and found that a couple of the dies still had a miniscule amount of
I got the ram about a week after that and installed it before trying to run MemTest86 (after figuring out how why the option was missing in GRUB), finding that 4-5 passes is the usual amount that most people test for. I saw the first pass finish after about an hour, so I was thinking another three hours and it should be done, but I was wrong and I stopped the test after getting too tired from staying up.
I started again the next morning and after about an hour, the screen turned off, which I found the cause to be that Shizuma wasn't plugged in. after I plugged her in, I started it once more and occasionally glanced at the screen. First pass took an hour (as I had seen previously), second test took about two hours (which I was also aware of), third test took three hours, and the fourth took about four hours for a total of about eight hours.
I don't remember exactly when I went and reinstalled Snow Leopard and Manjaro, but I did it to repartition the drive since I really didn't need to give OSX half the drive.
The reason why MemTest86 didn't show up in GRUB2 was because of Shizuma's EFI, so I needed to use the UEFI version of MemTest86 which was luckily in AUR, and after installing and rebooting, it showed up in GRUB2.
Recently I got a laptop stand with fans, but with the minute space between the top of the stand and the bottom of Shizuma, the airflow isn't great. As of this draft writing, I'm currently designing a riser that uses the mesh to stabilise it's location and lift the hinge end about 20mm.
I'm not entirely sure what I'll be using Shizuma for, but I'll find a use at some point.
With the laptop stand, I just used rubber feet to raise the hinge end up about 10mm (unless the stand I was originally talking about is a different one, I dunno). I also changed the 5 volt fans out for 12 volt ones and designed a replacement control board that uses a Firewire 400 jack to get power from Shizuma's Firewire 800 jack (via a Firewire 800 to Firewire 400 cable). I might write more about the replacment control board in a separate post, but don't hold your breath.
22 January 2017
2017 Linux Distributions to Watch
The article I read is: The Best Linux Distros to Watch Out for in 2017
First distro in the article is Solus, and they go on to say that it's a new distribution that's not a derivative of some other distro and is based on the rolling-release model. While I haven't taken a close look at Solus (by perusing their website or utilising the Dell to test it), there are topics that come to mind.
First off is desktop environments and window managers, while the article doesn't specify about what desktop environments are included, it's usually best to support the ones that people can quickly become familiar with, ones that are lightweight, ones that are well known, and/or any combination of them. Over the time I've been toying around with Linux, I've used GNOME 2, GNOME 3, KDE, LXDE, XFCE, Unity, Openbox, and whatever Fedora uses. Taking a shot in the dark, I would think Solus probably has GNOME 3 and KDE as their "official" desktop environments, and then maybe LXDE and XFCE as their "supported" desktop environments. I could be wrong, but I'm not entirely in the mood to poke around Solus' website and find out for myself.
The next is the software repository... well, a couple things here, but let's just delve into it anyway. I'm assuming that they have some sort of GUI and/or CLI package manager specifically built for their repositories (for example: openSUSE has
Another is architecture support. This is always a major topic because it's not just x86_64 computers that Linux users install Linux on. Obviously I'm not saying that they need to support RISC, MIPS, and so forth, but they should at least support most of the popular ARM types if they want to "compete" with the other distros.
So while I do like the idea of a non-derived, rolling-release distro, I don't think it's for me. While Manjaro is a derivative of Arch, it is a very similar concept to Solus, and I prefer being able to utilise the AUR to automatically compile the not-popular-enough software that I use when it is updated (assuming someone didn't orphan it beforehand). Depending on the architecture support, it may become something worthwhile to me if it's something I can utilise on the Banana Pi, assuming it properly writes the boot data for kernel upgrades (with openSUSE Tumbleweed, I'm better off downloading the new image and setting the system back up than trying to utilise
I do think that it should be great for most other users that want a rolling distro and not be using a derivative of some other distro.
Second up is Liri. While I've heard of the Papyrus project a bit, I can't say the same with Hawaii. I don't really have too much of an interest in it from the article itself, but I'll at least say that the desktop environment looks nice.
Next is LXLE. As a distro to revive old PCs, I'm somewhat interested in it, but in honesty, I'm more interested in PIXEL. I may give it and PIXEL a shot on the machines that are less powerful than Ziggy, but it will become a matter of which ends up being better.
Last in the article is KDE Neon. I've never been much of a fan of the KDE environment , since I had felt it to be awkward to use sometimes and a bit too much customisation in its appearance. While I do like making things nicely look the way I want things to look, the days of changing colours of every window aspect are long past me these days, and I just want a colour scheme I can grab from somewhere that fits what I'm looking for. There's a possibility that I may try it out to poke at KDE 5, but I highly doubt it.
None of ones in the article really struck me as well, since my needs are fairly met (with the old machines, ARM boards, and iBooks as the exception), but I will still keep my eyes peeled for something that seems would help me get closer to having my needs fully met.
First distro in the article is Solus, and they go on to say that it's a new distribution that's not a derivative of some other distro and is based on the rolling-release model. While I haven't taken a close look at Solus (by perusing their website or utilising the Dell to test it), there are topics that come to mind.
First off is desktop environments and window managers, while the article doesn't specify about what desktop environments are included, it's usually best to support the ones that people can quickly become familiar with, ones that are lightweight, ones that are well known, and/or any combination of them. Over the time I've been toying around with Linux, I've used GNOME 2, GNOME 3, KDE, LXDE, XFCE, Unity, Openbox, and whatever Fedora uses. Taking a shot in the dark, I would think Solus probably has GNOME 3 and KDE as their "official" desktop environments, and then maybe LXDE and XFCE as their "supported" desktop environments. I could be wrong, but I'm not entirely in the mood to poke around Solus' website and find out for myself.
The next is the software repository... well, a couple things here, but let's just delve into it anyway. I'm assuming that they have some sort of GUI and/or CLI package manager specifically built for their repositories (for example: openSUSE has
zypper, Fedora has yum, and so forth), and that it's not using one and/or based off of one from another distro (that would defeat the purpose of being a non-derivative, yes?). The other issue is with niche packages (the packages that have some sort of demand, but doesn't get prebuilt packages like popular packages). Does Solus walk in the same footsteps of most other distros by having their users manually compile these packages from source, or do they have something similar to the Arch User Repository?Another is architecture support. This is always a major topic because it's not just x86_64 computers that Linux users install Linux on. Obviously I'm not saying that they need to support RISC, MIPS, and so forth, but they should at least support most of the popular ARM types if they want to "compete" with the other distros.
So while I do like the idea of a non-derived, rolling-release distro, I don't think it's for me. While Manjaro is a derivative of Arch, it is a very similar concept to Solus, and I prefer being able to utilise the AUR to automatically compile the not-popular-enough software that I use when it is updated (assuming someone didn't orphan it beforehand). Depending on the architecture support, it may become something worthwhile to me if it's something I can utilise on the Banana Pi, assuming it properly writes the boot data for kernel upgrades (with openSUSE Tumbleweed, I'm better off downloading the new image and setting the system back up than trying to utilise
zypper to upgrade the kernel.I do think that it should be great for most other users that want a rolling distro and not be using a derivative of some other distro.
Second up is Liri. While I've heard of the Papyrus project a bit, I can't say the same with Hawaii. I don't really have too much of an interest in it from the article itself, but I'll at least say that the desktop environment looks nice.
Next is LXLE. As a distro to revive old PCs, I'm somewhat interested in it, but in honesty, I'm more interested in PIXEL. I may give it and PIXEL a shot on the machines that are less powerful than Ziggy, but it will become a matter of which ends up being better.
Last in the article is KDE Neon. I've never been much of a fan of the KDE environment , since I had felt it to be awkward to use sometimes and a bit too much customisation in its appearance. While I do like making things nicely look the way I want things to look, the days of changing colours of every window aspect are long past me these days, and I just want a colour scheme I can grab from somewhere that fits what I'm looking for. There's a possibility that I may try it out to poke at KDE 5, but I highly doubt it.
None of ones in the article really struck me as well, since my needs are fairly met (with the old machines, ARM boards, and iBooks as the exception), but I will still keep my eyes peeled for something that seems would help me get closer to having my needs fully met.
14 July 2016
New Skype for Linux Alpha & Franz
The article I read is: Microsoft is replacing Skype’s ancient Linux client with a web app (sort of).
I've actually read two or three articles before this one and was thinking about obtaining it to play with, but after reading the linked article, I found it wasn't necessary because it's essentially a "fancy" version of the web-based Skype.
I've been using Franz to connect to Skype since I've found it (before I was using web-based Skype in Firefox), and it's been a lot more easier to manage my messaging services, since it lets me connect to (the web versions of) Facebook Messenger, Skype, and Discord. Heck, I didn't even know Facebook Messenger had a web version until Franz (saves the hassle of the tiny pop-up window thing on the Facebook page).
I do recommend checking out Franz, as they're multi-platform (even Mac OS) and have a few messenger services that it can connect to. The only weird thing is using it in Manjaro (not sure if it affects any other distros, but I know it doesn't affect Windows 10), where it will glitch out when loading Skype. It seems to be having to do something with also having Discord, since removing Discord fixes it, but it also seems to load if I leave it alone for a while (I'll turn Melty on when I get home from work, and after I'm finished changing and stuff, Skype's up without a problem). If I'm unlucky (or impatient), I end up closing and reopening Franz several times before Skype comes up with the blue "Signing in" screen. I honestly should just let it be and wait for it (or get my Skype friends to get on Discord instead).
To be honest, it's nice that Microsoft's putting the effort into doing something about the dated Skype for Linux program, though I think it would've been better if they had just killed the program and have Linux users use the web-based Skype (or Franz) to connect. I don't think I really need to say more that I'm not going to use the new program if I don't have to.
19 June 2016
Snap Packages
The article I read is: Linux App Distribution Gets a Little Easier with "Snap".
I actually read a different article, but I realised I had things to write about it.
I read the other article yesterday, after a bit of apathy about Snap, and figured I'd give it a try since it was available on Arch (remember that Manjaro is based off of Arch).
I installed it and poked a bit with it, but decided to not do much more with it. Why? Because the packages that I would be installing from it could be counted on one hand.
Once there are a lot more packages, I'll most likely start using it, but I'll just hold off for now.
Raspberry Pi NAS
The article I read is: Raspberry Pi as a NAS (Network Attached Storage).
Well, it's not really an article, but did somehow end up in my Google Play Newsstand feed.
One thing that irks me is that if you're planning on making a low-power NAS that's decent, then the Banana Pi would be the better option because of the SATA port and gigabit LAN (both the Raspberry Pi 3 and the Banana Pi have Wifi, though the instructable utilises LAN, as it's probably the Raspberry Pi 2). The main drawback would probably have to be that with the Banana Pi can only support up to 2TB drives connected to the SATA port.
Now if you happened to have an unused Raspberry Pi laying around, then yes, it would make sense to utilise it to make a low-powered NAS, given that the read/write speeds are going to be much lower because of the USB 2.0 and/or 10/100 LAN.
My other irk is that NAS consumption really depends on the brand and type. Yes NAS units can easily draw over 10 watts when spinning a 3.5 inch hard drive (for a one-disk unit), but some (if not most) NAS units have a standby mode, where it spins down the hard drive(s) and waits for activity.
What's a bit interesting it that the person used a serial connection to access the Raspberry Pi. The main advantage would be that if you're setting a static IP address, then you will still have access to it without having to reopen an SSH line to it, but if you're not, then why bother spending more money on the cable?
With the CFS, I didn't bother with Samba, though I could have and have made it a bit easier to mount in Windows, but considering how rarely I'm using Windows these days, it's not worth any of the hassle (if it is at all).
Not sure what NAS units the person is thinking of, but my Synology NAS is neither fire nor water proof/resistant (might be a bit water resistant as long as it doesn't run toward any vents).
Again, while it's not a bad idea in general, it only seems worth doing if you already have a Raspberry Pi (and maybe an external hard drive) that aren't in use.
09 April 2016
Skype for Linux
The article I read is: Skype for Linux is lagging behind and falling apart due to Microsoft's neglect.
I'm not sure if the author was aware that the only update Microsoft gave to Skype for Linux back in June of 2014 was just so that the Skype program would be pointed to the new servers from the old, and that Microsoft didn't touch anything else beside that.
It was working fine until Microsoft started adding features to Skype (Windows and mobile), and I've really noticed it recently when trying to chat with my friend - the messages won't send, will double (when posting from another interface), and/or won't sync messages properly (most of the time I just get my friend's messages and not a copy of my own).
I will agree with the author that it seems like Microsoft will eventually make the web version of Skype the future for Linux, though I'm not fond of using it (even though it's still beta). My main irks with it is that I can't turn off the notification sound, I can't get my group chats unless they're in the list of (really) recent chats, and resizing the browser window makes the layout auto-resize in a wonky manner.
I probably will stop using Skype for Linux quite soon and uninstalling it from Manjaro, since it's just about useless. It's annoying that Microsoft isn't willing to spend the time/money for remaking/improving Skype for Linux, but I'm just gonna have to eat it and adapt.
25 March 2016
CFS
Late last year, sometime after learning SSHFS, I realised that it would be very convenient to have a centralised file server. Yes there is the NAS, but I prefer using it for backing up, considering RAID 1.
Anyway I bought another Banana Pi and hard drive, and poked around Amazon to find a box sized appropriately. Once I had all the parts, I got to work. I used the fan from the smaller Raspi "case" since it was the best option. I did a bit of prototyping and figured out the best locations for the Banana Pi and the fan, drilling the mounting holes soon after confirming.
It took quite a bit of time and effort to get the hole for the ethernet lined up correctly to cut, and after was finished cutting (not much less awkward than the double drive pi), I realised I cut too much, so placed a piece of tape on the inside, so that not much air would enter from the ethernet hole. For the power cable, I drilled a couple holes next to each other and cut out the plastic in between them before cleaning it up with a needle file. Once I was done with that, I taped the mesh over the intake hole and began prototyping a bit more.


While the power cable fit just fine through its hole, there wasn't anything that would stop it from being pulled out, nor would there be anything to keep the air from entering. I was wanting to use Plastimake, but I didn't feel like working with it. I looked around for some relatively thick plastic that I could use, and eventually came upon some picks for bass guitar, which I decided would be the best to use, as it would be the most time-efficient to modify. I drilled a hole, cut a slit to the hole, and made a couple more cuts to make a right-angle. While it's not entirely perfect, it was good enough.


The fan was a bit annoying because the closest hole saw was slightly larger in comparison to the fan, but I used some thin plastic from a blister pack to make a shim to minimise the air leakage. I think I used some leftover metric screws to mount the fan to the box, and the screw was much longer than needed, but I decided to leave it, as I didn't want to spend forever and a half cutting it down with the saw.
I used some small washers between the screwhead and fan, as well as between the nylon locknut and the box. I didn't really need the one between the screw head and the fan, but since the head was kinda large, I wanted the pressure a bit more even (or maybe something else... I can't really remember). I probably didn't need the washer between the nylon locknut and the box ether, but the fact that I had to drill the hole for the exhaust larger than I wanted made me a bit weary.


With that finished, I played around with running the cable in the box, finally finding a good path that wouldn't become a problem, but left little slack.

I then mounted the Banana Pi, plugged the fan in, and plugged the power in to test the fan. The connector I used is a 3-pin connector and the wire ties the two 5VDC pins together; the wires were taken from a "salvaged" IEEE 1394 (A.K.A. Firewire) header cable, and I didn't feel like chopping off the extra connector. I found the fan to be a lot noisier than I remember it being, and while it did confuse me a bit, I didn't really care that much.

I then moved onto figuring out the location for the hard drive on the lid, and at first, I was going to mount it directly above the Banana Pi, but the SATA cable made that idea more awkward than I wanted it to be. I then mounted it longitudinally along the length of the lid, keeping the hard drive as far away from the fan as possible.

Once I put the stand-offs on the hard drive and had the hard drive mounted to the lid, I plugged the SATA cable in on both sides.

Once the lid was fastened, I connected everything and set it up a bit before moving it to its final location. Something happened between power down and powering it back up after the move, and so I had to re-image the micro SD card and get everything set back up. But once that was done, I had a nice, easily-mountable file server.
The screws ended up spacing the box away from the interior side of the shelf it sits on, so it has plenty of space for the exhaust. Unintentionally genius.
I think it was earlier this year I updated it, and after rebooting, it wouldn't boot into openSUSE Tumbleweed properly. I diagnosed it a bit before taking the micro SD card to my room to grab the
Anyway I bought another Banana Pi and hard drive, and poked around Amazon to find a box sized appropriately. Once I had all the parts, I got to work. I used the fan from the smaller Raspi "case" since it was the best option. I did a bit of prototyping and figured out the best locations for the Banana Pi and the fan, drilling the mounting holes soon after confirming.
It took quite a bit of time and effort to get the hole for the ethernet lined up correctly to cut, and after was finished cutting (not much less awkward than the double drive pi), I realised I cut too much, so placed a piece of tape on the inside, so that not much air would enter from the ethernet hole. For the power cable, I drilled a couple holes next to each other and cut out the plastic in between them before cleaning it up with a needle file. Once I was done with that, I taped the mesh over the intake hole and began prototyping a bit more.


Inside view, intake hole, fan hole, power and ethernet holes, and inside of the ethernet hole.
While the power cable fit just fine through its hole, there wasn't anything that would stop it from being pulled out, nor would there be anything to keep the air from entering. I was wanting to use Plastimake, but I didn't feel like working with it. I looked around for some relatively thick plastic that I could use, and eventually came upon some picks for bass guitar, which I decided would be the best to use, as it would be the most time-efficient to modify. I drilled a hole, cut a slit to the hole, and made a couple more cuts to make a right-angle. While it's not entirely perfect, it was good enough.


Stopper orientation, and as prototyped.
The fan was a bit annoying because the closest hole saw was slightly larger in comparison to the fan, but I used some thin plastic from a blister pack to make a shim to minimise the air leakage. I think I used some leftover metric screws to mount the fan to the box, and the screw was much longer than needed, but I decided to leave it, as I didn't want to spend forever and a half cutting it down with the saw.
I used some small washers between the screwhead and fan, as well as between the nylon locknut and the box. I didn't really need the one between the screw head and the fan, but since the head was kinda large, I wanted the pressure a bit more even (or maybe something else... I can't really remember). I probably didn't need the washer between the nylon locknut and the box ether, but the fact that I had to drill the hole for the exhaust larger than I wanted made me a bit weary.


Inside and outside of mounted fan.
With that finished, I played around with running the cable in the box, finally finding a good path that wouldn't become a problem, but left little slack.

Not sure what caused the bottom edge to be blurry in some of these shots.
I then mounted the Banana Pi, plugged the fan in, and plugged the power in to test the fan. The connector I used is a 3-pin connector and the wire ties the two 5VDC pins together; the wires were taken from a "salvaged" IEEE 1394 (A.K.A. Firewire) header cable, and I didn't feel like chopping off the extra connector. I found the fan to be a lot noisier than I remember it being, and while it did confuse me a bit, I didn't really care that much.

Banana Pi with power (and without a micro SD card) and spinning fan.
I then moved onto figuring out the location for the hard drive on the lid, and at first, I was going to mount it directly above the Banana Pi, but the SATA cable made that idea more awkward than I wanted it to be. I then mounted it longitudinally along the length of the lid, keeping the hard drive as far away from the fan as possible.

Red marks was where I originally wanted the hard drive to be.
Once I put the stand-offs on the hard drive and had the hard drive mounted to the lid, I plugged the SATA cable in on both sides.

Just about finished.
Once the lid was fastened, I connected everything and set it up a bit before moving it to its final location. Something happened between power down and powering it back up after the move, and so I had to re-image the micro SD card and get everything set back up. But once that was done, I had a nice, easily-mountable file server.
The screws ended up spacing the box away from the interior side of the shelf it sits on, so it has plenty of space for the exhaust. Unintentionally genius.
I think it was earlier this year I updated it, and after rebooting, it wouldn't boot into openSUSE Tumbleweed properly. I diagnosed it a bit before taking the micro SD card to my room to grab the
vsftpd.conf file (and I think fstab as well) before re-imaging it with the latest image. Luckily it only took a couple hours to get it back up and running, so it wasn't a horrible time loss. Luckily with the Banana Pi side of the 2(DrivePi), I didn't reboot, so the update that broke the CFS wasn't applied.
24 March 2016
2(DrivePi)
With how long it's been with these projects and everything happening else between then and now, it's really difficult to remember all the details - please bear with me. (A quick notation to those that haven't noticed by now.)
Early February of last year, I wrote a couple posts that I was considering a Raspberry Pi 2, and the fact that it was six times faster than the B+ made it more appealing.
At some point I ended up finding a dual-core ARM board that was released as competition to the Raspberry Pi called the Banana Pi, which has gigabit ethernet and a SATA port. I was quite interested in it for using it for my bittorrent server, considering I can properly hook up a hard drive and be able to pull files off of said hard drive over the LAN much quicker.
I believe it was around early May that I began thinking of how to mount everything - the Raspberry Pi 2, the Banana Pi and the 2.5" hard drive. I drew quite a few designs and my friend at work gave me the suggestion for a 3D-printed case, which I didn't feel was going to be worth it. I originally wanted the case to have separate layers for each item and have the airflow in a certain way where it would effectively cool each item (there would be a fan that pushes the air out). I eventually realised that it would be space efficient to have a case that mounts to the back of a monitor, so it takes up less table space, and I took quite a bit of time to pick out a good box before drawing up anything else.
I then spent quite a bit of time figuring out how I wanted to arrange the parts inside the box, since I wanted to try to have a good airflow so the parts stay relatively cool. I think I went through a few ideas with the fan on the side wall (in relation to the box itself) before realising the fan hole would be fairly difficult to cut.
Eventually I found a couple of unused blower fans back from when I was trying to keep Ziggy cool, one of which didn't have wires because they broke off. I soldered a pair of wires to it and tested it, finding that it worked just fine, so I decided to use that instead of the regular case fan.
Since I was going to have another hard drive to keep my music files local for the Raspberry Pi 2, I had to keep the arrangement simple enough, and using an adaptor for mounting two 2.5" hard drives in a 3.5" bay was the way to go. I eventually decided to have the hard drive stack sit in the middle of the box, toward the side (again, in reference to the box), have one of the single-board computers (SBC) to one side of the stack, and the other to the other side (upside-down), with both SBC toward the opposite side (in sort of parabolic curve); the fan would be attached to the lid and blow out of the side.
Luckily, I waited long enough and a new version of the Banana Pi came out which had a bit of improvements, and so I bought it along with most of what I needed. I carefully drilled the hole patterns for the hard drive, the Raspberry Pi 2, the Banana pi, and VESA mounting before doing a bit of prototyping with the boards and box.
I used some of the stand-offs that I bought to mount that PCI-E adaptor thingy that I put in Melty to stand off the SBCs, and eventually found that I was going to need more than just one to properly run all the cables. I ended up using four for the Raspberry Pi 2 and six for the Banana Pi. Since using a bunch of the stand-offs wasn't exactly straight, I decided to look for something similar in height for both. For the Raspberry Pi 2, I used a 30mm stand-off (which accepts screws on both sides, lowering the height from the prototyped 32mm), and 50mm for the Banana Pi (accepts a screw on one side, raising the height from the prototyped 48mm). Luckily, the two millimetre difference of both stand-offs were really negligible when I prototyped it again.
When prototyping the first time, I realised that the adaptor brackets blocked the lower holes for the VESA mount, so I originally came up with that I would mount the lower hard drive to the box, mount the box to the monitor, then mount the bracket-attached upper hard drive to the lower one in a really awkward way. Eventually I had a "kickself" moment and grabbed some scrap aluminium sheets from work and made my own mounting plates, so that the lower screws wouldn't be blocked off (and also saves the adaptor bracket for its intended use).
With that, I carefully drilled the intake hole horizontally centre between the holes to the hard drive mounting a bit toward the bottom of the box (in relation to it's mounted configuration), cut the hole for the blower fan, and drilled the holes for mounting the blower fan. I think I also cut the holes for the cables at this time as well. The holes that I cut were awkward to do, since I was using a jeweller's saw, and if I had the right bits for the high-speed drill, I probably would have used it.


Since the only button-head screws I had were metric (there's a very small selection of small button-head screws at work), they ended up being much longer than I needed, and I prototyped a bit to figure out how much I'd have to cut off, which definitely easier said than done. I used button-heads because of the low profile, and I wanted to keep air resistance to a minimum since the heads were to reside inside the fan.
I made the mistake that I wouldn't be able to tighten the nylon locknuts or properly assemble the fan while doing this, and so I had to drill a couple more holes in the fan's case, so that I could access the screws. I obviously covered the holes with electrical tape and cut off the angled part of the metal bracket (which can partially be seen in the top view picture).


Though it wasn't really needed, I kept the silicone seal piece in the lid (I had to actually remove it to cut the hole because it was annoying). I then cut a square of the mesh stuff that I bought as a filter for the side panel for Mei-chan and taped it on the outside of the box over the hole. I tried not to cover the holes, but I found I hadn't much choice and cleaned the holes with an X-acto knife.


With the mounting plates, I taped the two pieces together, so that I could drill two holes at once, and it was somewhat awkward to mark the holes from the adaptor bracket, but the holes came out just fine. It was a bit tough to position the holes right, because I wanted to where it directed the airflow some, keep the drives apart enough, so that it wouldn't interfere too much with each other (because I had it planned where the tops of the hard drives would face each other), and not have the holes too close to the edge of the metal.

Sometime during testing, the Raspberry Pi 2 wasn't able to power the hard drive I wanted to use, so I was forced to buy an SSD for it (the Raspberry Pi 2 literally puts out no more than 500mA, and the hard drive I was trying to use needed another 50mA :T).
I just remembered that I wanted to space the hard drive apart from the SSD so that the SSD has a less likely chance to absorb heat from the hard drive (in retrospect, just something that really wouldn't matter). Anyway, after assembling the hard drive unit together, I realised that I could've lowered the mounting plates a bit more to really direct the airflow. Que sera sera.


Since the stand-offs are screwed into the bottom mounting holes of the hard drive, I had to use some washers to reduce the length of the screws to the mounting plate. The threaded portion of the stand-offs were too long for the bottom mounting holes of the hard drive, so I used the included nut to reduce the length. I believe I used thread-locking compound for (at least) the bottom mounting screws to the mounting plates, so that the vibration doesn't loosen the screws.


After assembling the hard drive unit, I mounted it into the box.


Then I mounted the SBCs (after plugging the fan into the Banana Pi, since it's "upside-down") and mounted it to the monitor. I used a washer between the screw-head and the box since the plastic was a bit soft (I don't remember if it's ABS, poly-carbonite, or a mixture of both). I used a spacer between the box and the monitor, so the intake wasn't clogged, along with keeping the screws and nuts from pressing into the monitor (or worse, warping that side of the box). As I positioned the lid, I routed the cable to the fan, so that it wouldn't get sandwiched on any of the seams. It turned out quite well, minus the hand-cut screws protruding from the nylon locknuts.


I had the Raspberry Pi 2 hooked up to the DVI port and the Banana Pi to the VGA port, and use the monitor's menu to switch between them (when needed).


Later, I got the button-head screws in the right length, so that it would be flush with the "top" of the nylon locknut to look nicer.

Later I did some experimentation with the command-line interface of transmission and found it wasn't all that bad, so I decided to redo the Banana Pi a bit, so that I wouldn't need the monitor (or Bluetooth adapter). While I thought it'd be simple, it was a bit different than I was expecting (the folder was a bit different because the folder the CLI uses is transmission-daemon and not transmission. Once that was figured out, it was up and running in openSUSE Tumbleweed instead of the Banana Pi openSUSE image.
The Raspberry Pi 2 is better than the original Raspberry Pi (generation one), but still don't see the 1080p playback (again, with XFCE and VLC)... Whatever.
With the announcement/release (I don't remember off the top of my head at the moment) of the Raspberry Pi 3, it will be replacing the Raspberry Pi 2 after some testing. I might run Debian testing on the Raspberry Pi 3, but we'll have to see. The reason why I want to do this is because the Raspberry Pi 3 has built in Bluetooth (and also WiFi, which will be turned off), which saves me a USB port. It also has a bit of a performance increase, but I'm not expecting much. There's also the ARM64 architecture, but I'm doubting it'll have any visible impact either.
As far as the name goes, I took a few days to think about it, eventually turning "double drive-by" to "double drive-pi" because there was two "pi's" and two hard drives. I quickly put the "official" name in mathematical notation - 2(DrivePi) - where "DrivePi" is each Pi and hard drive combination, and the 2 in front of the parenthesis multiples the parenthesis' contents by two (in other words, doubling). I kinda want to have it on the lid, and use the screw/nylon locknut protrusion for the dots of each "i", but it wasn't going to be doable. Well, I had thought about it again, and I could very well put the two at the end, though it technically would be read "drive-pi doubled" instead. I'll worry about it when I actually care.
That's all on the 2(DrivePi) for now. It's not 100% complete, but at least it's well over 90%.
Early February of last year, I wrote a couple posts that I was considering a Raspberry Pi 2, and the fact that it was six times faster than the B+ made it more appealing.
At some point I ended up finding a dual-core ARM board that was released as competition to the Raspberry Pi called the Banana Pi, which has gigabit ethernet and a SATA port. I was quite interested in it for using it for my bittorrent server, considering I can properly hook up a hard drive and be able to pull files off of said hard drive over the LAN much quicker.
I believe it was around early May that I began thinking of how to mount everything - the Raspberry Pi 2, the Banana Pi and the 2.5" hard drive. I drew quite a few designs and my friend at work gave me the suggestion for a 3D-printed case, which I didn't feel was going to be worth it. I originally wanted the case to have separate layers for each item and have the airflow in a certain way where it would effectively cool each item (there would be a fan that pushes the air out). I eventually realised that it would be space efficient to have a case that mounts to the back of a monitor, so it takes up less table space, and I took quite a bit of time to pick out a good box before drawing up anything else.
I then spent quite a bit of time figuring out how I wanted to arrange the parts inside the box, since I wanted to try to have a good airflow so the parts stay relatively cool. I think I went through a few ideas with the fan on the side wall (in relation to the box itself) before realising the fan hole would be fairly difficult to cut.
Eventually I found a couple of unused blower fans back from when I was trying to keep Ziggy cool, one of which didn't have wires because they broke off. I soldered a pair of wires to it and tested it, finding that it worked just fine, so I decided to use that instead of the regular case fan.
Since I was going to have another hard drive to keep my music files local for the Raspberry Pi 2, I had to keep the arrangement simple enough, and using an adaptor for mounting two 2.5" hard drives in a 3.5" bay was the way to go. I eventually decided to have the hard drive stack sit in the middle of the box, toward the side (again, in reference to the box), have one of the single-board computers (SBC) to one side of the stack, and the other to the other side (upside-down), with both SBC toward the opposite side (in sort of parabolic curve); the fan would be attached to the lid and blow out of the side.
Luckily, I waited long enough and a new version of the Banana Pi came out which had a bit of improvements, and so I bought it along with most of what I needed. I carefully drilled the hole patterns for the hard drive, the Raspberry Pi 2, the Banana pi, and VESA mounting before doing a bit of prototyping with the boards and box.
I used some of the stand-offs that I bought to mount that PCI-E adaptor thingy that I put in Melty to stand off the SBCs, and eventually found that I was going to need more than just one to properly run all the cables. I ended up using four for the Raspberry Pi 2 and six for the Banana Pi. Since using a bunch of the stand-offs wasn't exactly straight, I decided to look for something similar in height for both. For the Raspberry Pi 2, I used a 30mm stand-off (which accepts screws on both sides, lowering the height from the prototyped 32mm), and 50mm for the Banana Pi (accepts a screw on one side, raising the height from the prototyped 48mm). Luckily, the two millimetre difference of both stand-offs were really negligible when I prototyped it again.
When prototyping the first time, I realised that the adaptor brackets blocked the lower holes for the VESA mount, so I originally came up with that I would mount the lower hard drive to the box, mount the box to the monitor, then mount the bracket-attached upper hard drive to the lower one in a really awkward way. Eventually I had a "kickself" moment and grabbed some scrap aluminium sheets from work and made my own mounting plates, so that the lower screws wouldn't be blocked off (and also saves the adaptor bracket for its intended use).
With that, I carefully drilled the intake hole horizontally centre between the holes to the hard drive mounting a bit toward the bottom of the box (in relation to it's mounted configuration), cut the hole for the blower fan, and drilled the holes for mounting the blower fan. I think I also cut the holes for the cables at this time as well. The holes that I cut were awkward to do, since I was using a jeweller's saw, and if I had the right bits for the high-speed drill, I probably would have used it.


Inside, backside, and inside bottom of the box.
Since the only button-head screws I had were metric (there's a very small selection of small button-head screws at work), they ended up being much longer than I needed, and I prototyped a bit to figure out how much I'd have to cut off, which definitely easier said than done. I used button-heads because of the low profile, and I wanted to keep air resistance to a minimum since the heads were to reside inside the fan.
I made the mistake that I wouldn't be able to tighten the nylon locknuts or properly assemble the fan while doing this, and so I had to drill a couple more holes in the fan's case, so that I could access the screws. I obviously covered the holes with electrical tape and cut off the angled part of the metal bracket (which can partially be seen in the top view picture).


Inside, outside, and top of lid with fan attached.
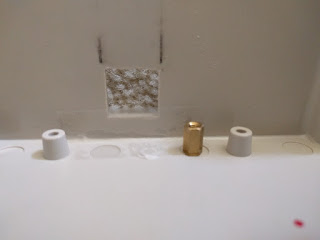
Though it wasn't really needed, I kept the silicone seal piece in the lid (I had to actually remove it to cut the hole because it was annoying). I then cut a square of the mesh stuff that I bought as a filter for the side panel for Mei-chan and taped it on the outside of the box over the hole. I tried not to cover the holes, but I found I hadn't much choice and cleaned the holes with an X-acto knife.


Inside and outside of the box with the mesh (I propped the box up for the inside view because the mesh blended into the carpet).
With the mounting plates, I taped the two pieces together, so that I could drill two holes at once, and it was somewhat awkward to mark the holes from the adaptor bracket, but the holes came out just fine. It was a bit tough to position the holes right, because I wanted to where it directed the airflow some, keep the drives apart enough, so that it wouldn't interfere too much with each other (because I had it planned where the tops of the hard drives would face each other), and not have the holes too close to the edge of the metal.
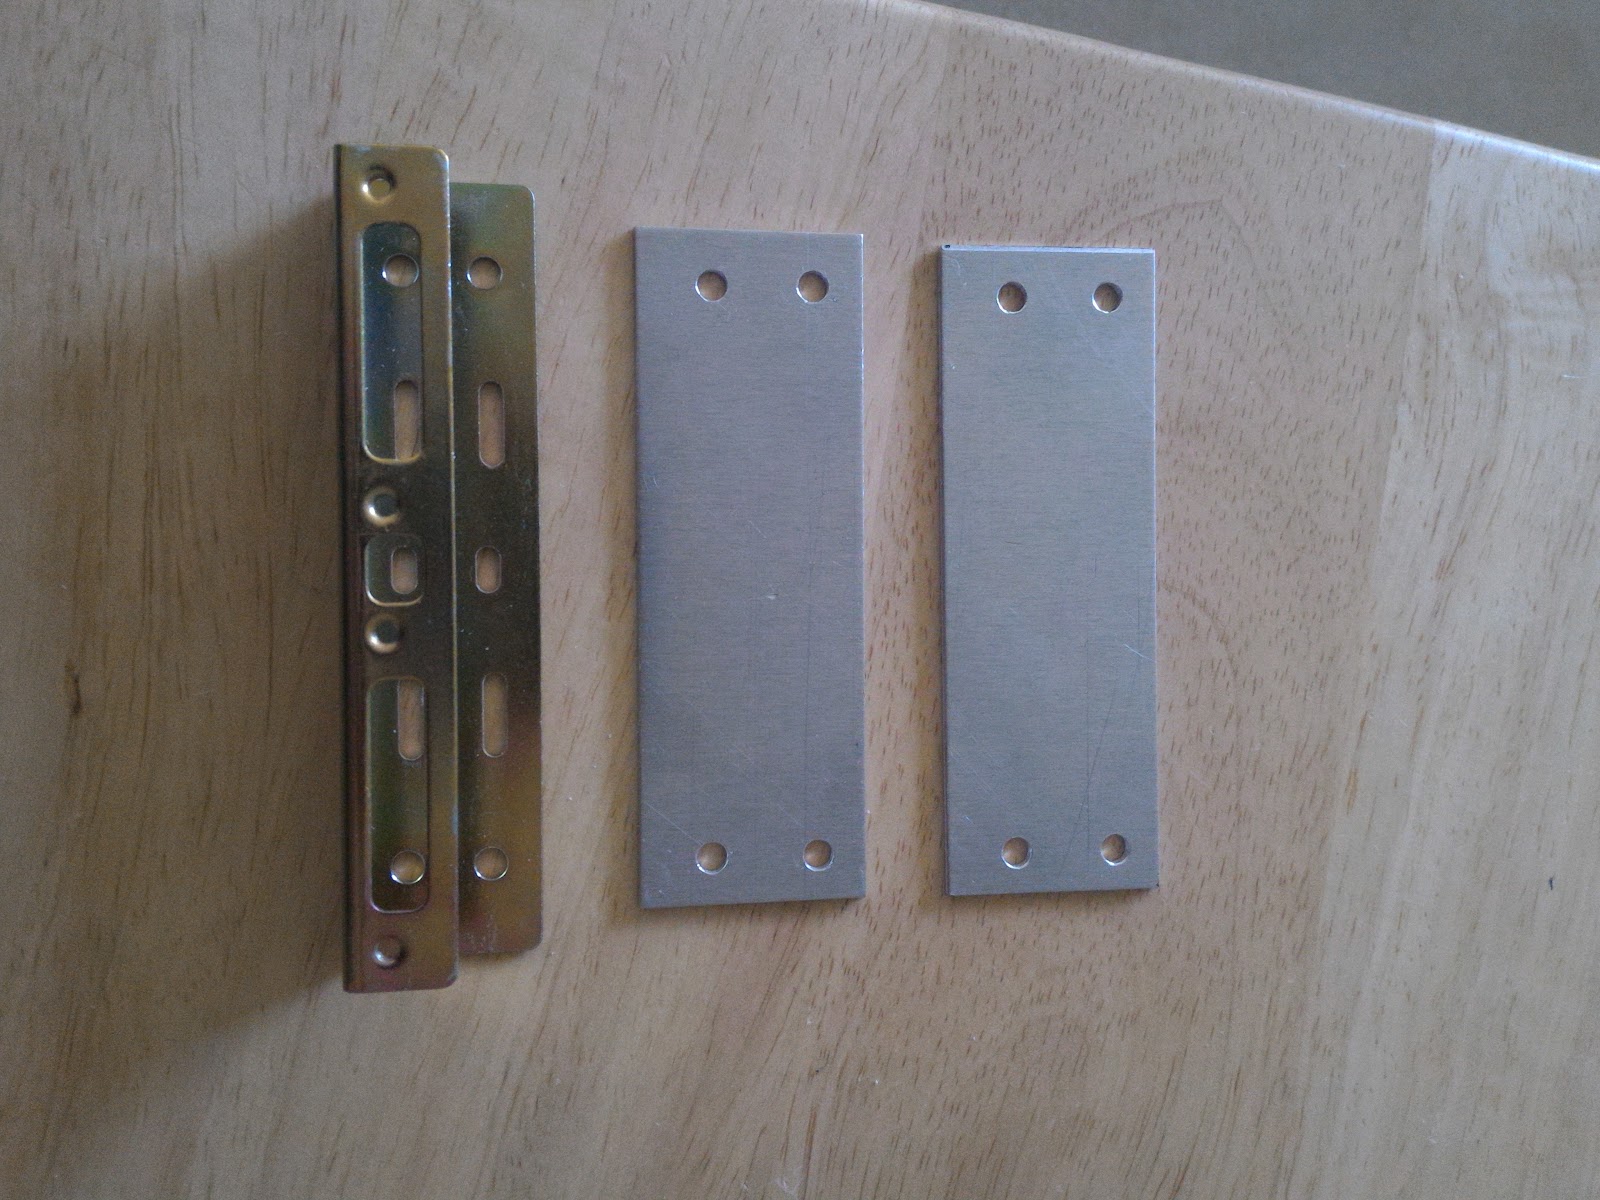
Adaptation bracket, and the two mounting plates.
Sometime during testing, the Raspberry Pi 2 wasn't able to power the hard drive I wanted to use, so I was forced to buy an SSD for it (the Raspberry Pi 2 literally puts out no more than 500mA, and the hard drive I was trying to use needed another 50mA :T).
I just remembered that I wanted to space the hard drive apart from the SSD so that the SSD has a less likely chance to absorb heat from the hard drive (in retrospect, just something that really wouldn't matter). Anyway, after assembling the hard drive unit together, I realised that I could've lowered the mounting plates a bit more to really direct the airflow. Que sera sera.


Top 3/4 view and "bottom" view of the unit.
Since the stand-offs are screwed into the bottom mounting holes of the hard drive, I had to use some washers to reduce the length of the screws to the mounting plate. The threaded portion of the stand-offs were too long for the bottom mounting holes of the hard drive, so I used the included nut to reduce the length. I believe I used thread-locking compound for (at least) the bottom mounting screws to the mounting plates, so that the vibration doesn't loosen the screws.


3/4 view of the washers, and bottom view of the unit.
After assembling the hard drive unit, I mounted it into the box.


Inside and outside with the hard drive unit mounted.
Then I mounted the SBCs (after plugging the fan into the Banana Pi, since it's "upside-down") and mounted it to the monitor. I used a washer between the screw-head and the box since the plastic was a bit soft (I don't remember if it's ABS, poly-carbonite, or a mixture of both). I used a spacer between the box and the monitor, so the intake wasn't clogged, along with keeping the screws and nuts from pressing into the monitor (or worse, warping that side of the box). As I positioned the lid, I routed the cable to the fan, so that it wouldn't get sandwiched on any of the seams. It turned out quite well, minus the hand-cut screws protruding from the nylon locknuts.


Finished inside, outside, and top.
I had the Raspberry Pi 2 hooked up to the DVI port and the Banana Pi to the VGA port, and use the monitor's menu to switch between them (when needed).


Later, I got the button-head screws in the right length, so that it would be flush with the "top" of the nylon locknut to look nicer.

Colour is slightly off because of the flash.
Later I did some experimentation with the command-line interface of transmission and found it wasn't all that bad, so I decided to redo the Banana Pi a bit, so that I wouldn't need the monitor (or Bluetooth adapter). While I thought it'd be simple, it was a bit different than I was expecting (the folder was a bit different because the folder the CLI uses is transmission-daemon and not transmission. Once that was figured out, it was up and running in openSUSE Tumbleweed instead of the Banana Pi openSUSE image.
The Raspberry Pi 2 is better than the original Raspberry Pi (generation one), but still don't see the 1080p playback (again, with XFCE and VLC)... Whatever.
With the announcement/release (I don't remember off the top of my head at the moment) of the Raspberry Pi 3, it will be replacing the Raspberry Pi 2 after some testing. I might run Debian testing on the Raspberry Pi 3, but we'll have to see. The reason why I want to do this is because the Raspberry Pi 3 has built in Bluetooth (and also WiFi, which will be turned off), which saves me a USB port. It also has a bit of a performance increase, but I'm not expecting much. There's also the ARM64 architecture, but I'm doubting it'll have any visible impact either.
As far as the name goes, I took a few days to think about it, eventually turning "double drive-by" to "double drive-pi" because there was two "pi's" and two hard drives. I quickly put the "official" name in mathematical notation - 2(DrivePi) - where "DrivePi" is each Pi and hard drive combination, and the 2 in front of the parenthesis multiples the parenthesis' contents by two (in other words, doubling). I kinda want to have it on the lid, and use the screw/nylon locknut protrusion for the dots of each "i", but it wasn't going to be doable. Well, I had thought about it again, and I could very well put the two at the end, though it technically would be read "drive-pi doubled" instead. I'll worry about it when I actually care.
That's all on the 2(DrivePi) for now. It's not 100% complete, but at least it's well over 90%.
23 March 2016
NTPi
I think posts from here on will be chronological, but I can't give any guarantees.
Anyway, this Raspberry Pi (first generation) was my best friend's and he stuffed it away since it was underwhelming for him (I don't know what he was trying to do with it), so I decided to take it off of his hands to tinker around with. Sometime last year, I decided to turn it into a stratum 1 time server and got it all put together in the latter half of April, with the fine tuning being finished in May.
I started with removing the RCA video and the stereo jacks, since I was going to mount the antenna connection there. I also removed the ribbon cable connector for the camera (marked as S2 on the board), since I didn't need it and it might've been in the way of the GPS breakout board (it might not have, but I didn't want to take chances). I got frustrated with trying to de-solder the parts, so I ended up destroying the jacks to get to make it easier. The ribbon cable connector I ended up using the cutters to break the legs away from the board, almost damaging the capacitor at C1 in the process (I think it made it out alive). I did the work during lunch at work, since work was better equipped (or at least I thought I would've been better off doing it at work).

Instead of using the SD card protector add-on (that I would've had to buy), I decided to use a micro SD card adaptor that fits entirely within the case, which allows me to make a cover with a flat piece of plastic instead to cover the hole.

I also decided to use some flat-black paint stuff to paint the stems of the light pipes, so that there'd be less bleeding, and once that was dry, I put the case together (without the screws) before setting it aside for the night.


I then modified the case by cutting away the plastic between the holes meant for the RCA and stereo jacks to allow for the GPS antenna connector. Drilling an appropriately-sized hole wouldn't have worked well, so it's why I decided against it.

Out of an old project box from Radio Shack (which was for my electronics correspondence course final back in high school, which became the first version of the soundcard switchbox), I cut an appropriately-shaped (and sized) piece to cover the massive hole and to mount the antenna connector to. I also cut a piece of thinner plastic to make up for the extra space.


Then, I cut another piece for the SD card slot, using the leftover piece of the panel I cut off of the box (the picture was taken after I cut both pieces from that panel), and also another piece of the thin plastic to fill the remaining space. While I wanted it to be completely flat, I didn't feel like cutting into the box any more than I already had, so I just took the more efficient route instead. The cover is tight enough to where it is fairly difficult to slide, but it wouldn't matter much with the micro USB cable plugged in.


Afterwards, I drilled the holes to mount the GPS breakout unit, and the hole for the antenna connector. As you can see, I also cut a hole in the thin plastic (also labelling the orientation so that the hole lines up properly), so that the connector would mount against the thick plastic. I used some wires from motherboard harnesses along with an appropriate plug, which I had to drill a hole to allow it to be plugged into the GPIO header.


I finished it up by securing the antenna connector and testing it out. Eventually I got a hold of some leftover parts from work and redid the wire harness from the GPS to the GPIO so that the wires would be at a right angle from the pins. Unfortunately, the IDC connector that I used was 3-pin (two of them) and not 6-pin, but it didn't matter, since it was going to stay plugged in. While using the crimper, I didn't squeeze/release properly, which misaligns the plug, and ended up smashing the last in the crimp series (red wire). I crimped the connection properly, so it works just fine, but just doesn't look that pretty.


Unfortunately, while reassembling the NTPi after taking pictures, I accidentally sandwiched the antenna cable between the spacer and the case, and luckily I caught it before it became a major problem. While it looks bad, I made sure that the cable wasn't shorted, and carefully reattached the GPS unit (the picture above was before disassembly for pictures). I also scraped the solder mask of the GPS a bit when I was using pliers to hold the nut to loosen the screw, but since it was just the ground pad, I wasn't too worried about it.


Well, needless to say, I put the case back together, and got it back up for testing. At some point I put in the coin-cell battery for the RTC before putting the NTPi into service. I played around with the offset amounts some, and at some point just left it alone when I was okay with it.


While the NTPi isn't at the location where I was planning on having it, I find it actually better than the planned location, since the GPS unit gets quite warm, and the magnetic antenna is able to stick to the metal drywall cover where the window is.
It used to be the time server for all of my computers, but since I've switched to Manjaro, it now just serves the time for my old smartphones (which are being used as clocks). I might modify the NTP config file and start using the NTPi again, but, that's for another time...
The case I used is the Cyntech case for those wondering.
Anyway, this Raspberry Pi (first generation) was my best friend's and he stuffed it away since it was underwhelming for him (I don't know what he was trying to do with it), so I decided to take it off of his hands to tinker around with. Sometime last year, I decided to turn it into a stratum 1 time server and got it all put together in the latter half of April, with the fine tuning being finished in May.
I started with removing the RCA video and the stereo jacks, since I was going to mount the antenna connection there. I also removed the ribbon cable connector for the camera (marked as S2 on the board), since I didn't need it and it might've been in the way of the GPS breakout board (it might not have, but I didn't want to take chances). I got frustrated with trying to de-solder the parts, so I ended up destroying the jacks to get to make it easier. The ribbon cable connector I ended up using the cutters to break the legs away from the board, almost damaging the capacitor at C1 in the process (I think it made it out alive). I did the work during lunch at work, since work was better equipped (or at least I thought I would've been better off doing it at work).

The newly-modified board in the lower-half of the unmodified case.
Instead of using the SD card protector add-on (that I would've had to buy), I decided to use a micro SD card adaptor that fits entirely within the case, which allows me to make a cover with a flat piece of plastic instead to cover the hole.

View of the micro SD card in the adaptor in the SD card slot of the Raspberry Pi.
I also decided to use some flat-black paint stuff to paint the stems of the light pipes, so that there'd be less bleeding, and once that was dry, I put the case together (without the screws) before setting it aside for the night.


The painted light pipes, holes where the jacks are supposed to be, and the outside view of the adaptor.
I then modified the case by cutting away the plastic between the holes meant for the RCA and stereo jacks to allow for the GPS antenna connector. Drilling an appropriately-sized hole wouldn't have worked well, so it's why I decided against it.

Though it didn't matter, I did spend a small amount of time to make it look decent.
Out of an old project box from Radio Shack (which was for my electronics correspondence course final back in high school, which became the first version of the soundcard switchbox), I cut an appropriately-shaped (and sized) piece to cover the massive hole and to mount the antenna connector to. I also cut a piece of thinner plastic to make up for the extra space.


It was turning out better than I was expecting.
Then, I cut another piece for the SD card slot, using the leftover piece of the panel I cut off of the box (the picture was taken after I cut both pieces from that panel), and also another piece of the thin plastic to fill the remaining space. While I wanted it to be completely flat, I didn't feel like cutting into the box any more than I already had, so I just took the more efficient route instead. The cover is tight enough to where it is fairly difficult to slide, but it wouldn't matter much with the micro USB cable plugged in.


Inside and outside view of the SD slot cover.
Afterwards, I drilled the holes to mount the GPS breakout unit, and the hole for the antenna connector. As you can see, I also cut a hole in the thin plastic (also labelling the orientation so that the hole lines up properly), so that the connector would mount against the thick plastic. I used some wires from motherboard harnesses along with an appropriate plug, which I had to drill a hole to allow it to be plugged into the GPIO header.


The drilled hole, GPS breakout mounted to the case, inside view, and outside views.
I finished it up by securing the antenna connector and testing it out. Eventually I got a hold of some leftover parts from work and redid the wire harness from the GPS to the GPIO so that the wires would be at a right angle from the pins. Unfortunately, the IDC connector that I used was 3-pin (two of them) and not 6-pin, but it didn't matter, since it was going to stay plugged in. While using the crimper, I didn't squeeze/release properly, which misaligns the plug, and ended up smashing the last in the crimp series (red wire). I crimped the connection properly, so it works just fine, but just doesn't look that pretty.


The connectors, close-up of the "bite mark", height of the pins compared to the wire exit, height of the plug compared with the GPIO pins, and the GPS end of the cable with orange wire cut.
Unfortunately, while reassembling the NTPi after taking pictures, I accidentally sandwiched the antenna cable between the spacer and the case, and luckily I caught it before it became a major problem. While it looks bad, I made sure that the cable wasn't shorted, and carefully reattached the GPS unit (the picture above was before disassembly for pictures). I also scraped the solder mask of the GPS a bit when I was using pliers to hold the nut to loosen the screw, but since it was just the ground pad, I wasn't too worried about it.


Top and bottom of where the cable was sandwiched, and the scrape on the GPS.
Well, needless to say, I put the case back together, and got it back up for testing. At some point I put in the coin-cell battery for the RTC before putting the NTPi into service. I played around with the offset amounts some, and at some point just left it alone when I was okay with it.


Inside picture to mimic a previous image taken, better inside shot, NTPi assembled with screws painted.
While the NTPi isn't at the location where I was planning on having it, I find it actually better than the planned location, since the GPS unit gets quite warm, and the magnetic antenna is able to stick to the metal drywall cover where the window is.
It used to be the time server for all of my computers, but since I've switched to Manjaro, it now just serves the time for my old smartphones (which are being used as clocks). I might modify the NTP config file and start using the NTPi again, but, that's for another time...
The case I used is the Cyntech case for those wondering.
Subscribe to:
Posts (Atom)