Anyway I bought another Banana Pi and hard drive, and poked around Amazon to find a box sized appropriately. Once I had all the parts, I got to work. I used the fan from the smaller Raspi "case" since it was the best option. I did a bit of prototyping and figured out the best locations for the Banana Pi and the fan, drilling the mounting holes soon after confirming.
It took quite a bit of time and effort to get the hole for the ethernet lined up correctly to cut, and after was finished cutting (not much less awkward than the double drive pi), I realised I cut too much, so placed a piece of tape on the inside, so that not much air would enter from the ethernet hole. For the power cable, I drilled a couple holes next to each other and cut out the plastic in between them before cleaning it up with a needle file. Once I was done with that, I taped the mesh over the intake hole and began prototyping a bit more.
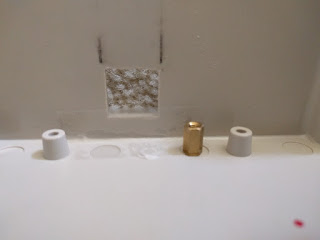
Inside view, intake hole, fan hole, power and ethernet holes, and inside of the ethernet hole.
While the power cable fit just fine through its hole, there wasn't anything that would stop it from being pulled out, nor would there be anything to keep the air from entering. I was wanting to use Plastimake, but I didn't feel like working with it. I looked around for some relatively thick plastic that I could use, and eventually came upon some picks for bass guitar, which I decided would be the best to use, as it would be the most time-efficient to modify. I drilled a hole, cut a slit to the hole, and made a couple more cuts to make a right-angle. While it's not entirely perfect, it was good enough.
Stopper orientation, and as prototyped.
The fan was a bit annoying because the closest hole saw was slightly larger in comparison to the fan, but I used some thin plastic from a blister pack to make a shim to minimise the air leakage. I think I used some leftover metric screws to mount the fan to the box, and the screw was much longer than needed, but I decided to leave it, as I didn't want to spend forever and a half cutting it down with the saw.
I used some small washers between the screwhead and fan, as well as between the nylon locknut and the box. I didn't really need the one between the screw head and the fan, but since the head was kinda large, I wanted the pressure a bit more even (or maybe something else... I can't really remember). I probably didn't need the washer between the nylon locknut and the box ether, but the fact that I had to drill the hole for the exhaust larger than I wanted made me a bit weary.
Inside and outside of mounted fan.
With that finished, I played around with running the cable in the box, finally finding a good path that wouldn't become a problem, but left little slack.
Not sure what caused the bottom edge to be blurry in some of these shots.
I then mounted the Banana Pi, plugged the fan in, and plugged the power in to test the fan. The connector I used is a 3-pin connector and the wire ties the two 5VDC pins together; the wires were taken from a "salvaged" IEEE 1394 (A.K.A. Firewire) header cable, and I didn't feel like chopping off the extra connector. I found the fan to be a lot noisier than I remember it being, and while it did confuse me a bit, I didn't really care that much.
Banana Pi with power (and without a micro SD card) and spinning fan.
I then moved onto figuring out the location for the hard drive on the lid, and at first, I was going to mount it directly above the Banana Pi, but the SATA cable made that idea more awkward than I wanted it to be. I then mounted it longitudinally along the length of the lid, keeping the hard drive as far away from the fan as possible.
Red marks was where I originally wanted the hard drive to be.
Once I put the stand-offs on the hard drive and had the hard drive mounted to the lid, I plugged the SATA cable in on both sides.
Just about finished.
Once the lid was fastened, I connected everything and set it up a bit before moving it to its final location. Something happened between power down and powering it back up after the move, and so I had to re-image the micro SD card and get everything set back up. But once that was done, I had a nice, easily-mountable file server.
The screws ended up spacing the box away from the interior side of the shelf it sits on, so it has plenty of space for the exhaust. Unintentionally genius.
I think it was earlier this year I updated it, and after rebooting, it wouldn't boot into openSUSE Tumbleweed properly. I diagnosed it a bit before taking the micro SD card to my room to grab the
vsftpd.conf file (and I think fstab as well) before re-imaging it with the latest image. Luckily it only took a couple hours to get it back up and running, so it wasn't a horrible time loss. Luckily with the Banana Pi side of the 2(DrivePi), I didn't reboot, so the update that broke the CFS wasn't applied.


No comments:
Post a Comment